
My First AI Muscle Transformation Looked Terrible
I uploaded a plain portrait, typed “make him muscular,” and got exactly what I asked for. The result was also a mess. The shoulders were enormous. The arms didn’t match the torso. The shirt changed between frames. The fingers bent in ways fingers don’t. A door frame in the background curved like it was melting, and the face looked like a cousin of the person I’d uploaded.
After running a lot of images and prompts, I figured out that generating muscles is easy. Generating a believable transformation is much harder.
So I changed the approach. Instead of asking AI for “huge muscles,” I treated the change like a short visual-effects shot, with a starting frame, a controlled change, and things that must stay put. I ran the experiment in Pixwith’s AI generation workflow, and this article covers what I learned.
What Is a Free AI Muscle Generator?
An AI muscle generator uses generative image or video models to reinterpret a person’s physique. Depending on the tool, it can change:
- Shoulders
- Chest
- Arms
- Abdomen
- Back
- Waist-to-shoulder ratio
- Posture
- Muscle definition
Most pages blur an important distinction between three kinds of tools:
- Static muscle editor: produces one transformed image.
- Muscle transformation generator: creates a progression from the original look to the muscular version.
- AI muscle video generator: tries to keep the person’s identity and surroundings stable while the physique changes over multiple frames.
Search results show this split clearly. Fotor and AirBrush focus on still-image enhancement, while PicLumen, Photo Animate and Edimakor promote transformation videos.
The Real Challenge Isn’t Adding Muscle. It’s Preserving the Person.
Five things have to stay stable for a result to look real.
1. Facial identity
The transformed person should still clearly look like the original. Watch for jaw changes, eye changes, hairstyle drift and shifts in skin tone.
2. Body proportions
Bigger biceps without matching changes to the shoulders, chest and posture look pasted on. A believable result scales the whole upper body together, so the arms, torso and stance all read as one person.
3. Clothing
A fitted T-shirt should stretch across a larger torso. Weaker outputs often change the shirt color, turn it sleeveless, alter logos or produce fabric folds that couldn’t exist.
4. Lighting and shadows
Muscle definition comes mostly from shadow. If the original light hits from the left but the generated ab shadows fall from above, the image feels fake immediately, even if most viewers can’t say why.
5. Background geometry
Door frames, gym equipment and walls tend to bend when the model changes body width. I rarely see this mentioned in other guides, but it was one of the most consistent flaws in my tests.
My Test: One Photo, Four Different Muscle Prompts
I used a single source photo for every run. It showed an adult subject with the waist or full body visible, arms slightly away from the torso, simple fitted clothing, a neutral background and directional natural light. For each output I checked identity, anatomy, clothing, background and overall realism.
Test 1: Generic prompt
Prompt idea: Make him muscular.
This gives the model almost no constraints. The change was dramatic, but everything else drifted. The face shifted, the shirt changed and the background warped a little.
Test 2: Extreme bodybuilding prompt
I asked for massive shoulders, huge biceps, a pronounced chest, a six-pack and a bodybuilding physique.
Extreme requests expose the weak spots of a model. The proportions broke first, then the clothing, and the lighting stopped matching the scene.
Test 3: Controlled athletic transformation
I asked for athletic shoulders, moderately larger arms, natural chest development, subtle abdominal definition and realistic human proportions.
Compared with Test 2, the result looked far more like a real photograph. That led to the first useful finding: more muscle does not make a more convincing transformation.
Test 4: Controlled transformation plus preservation instructions
The prompt: Transform the subject into a naturally muscular athletic physique. Increase shoulder width slightly, define the chest and arms, and add subtle abdominal definition. Preserve the same face, hairstyle, skin tone, clothing, pose, camera position, lighting and background.
This was the most consistent output of the four. The face stayed recognizable and the shirt kept its color and logo placement. The background stayed straight. Telling the model what not to touch made a bigger difference than any description of the muscles themselves.
The Prompt Formula That Produced My Most Believable Result
Instead of collecting twenty generic prompts, I settled on one structure that I could reuse:
Subject + transformation magnitude + target muscles + realism + preservation instructions + motion + camera
Here is an example built from it:
Adult man standing in the same position gradually develops a lean athletic physique, with broader shoulders, defined biceps, natural chest development and subtle visible abs. Preserve his face, hairstyle, skin tone and clothing. Keep the room and camera position unchanged. Realistic anatomy and skin texture. Slow cinematic push-in while he naturally flexes his arms.
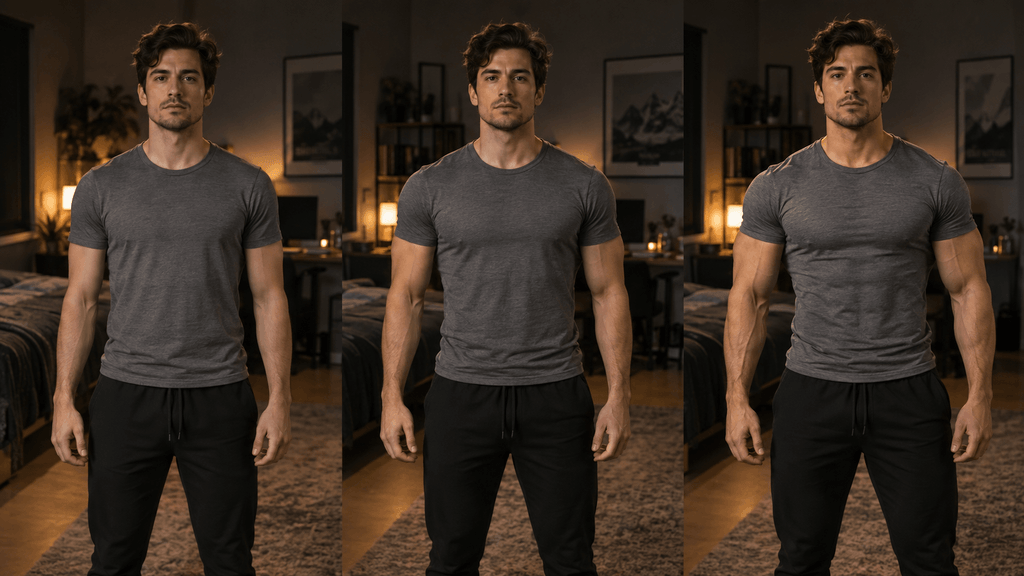
Why each part matters:
- Subject: anchors who the model is working with.
- Transformation magnitude: words like “gradually,” “lean” and “slightly” stop the model from overshooting.
- Target muscles: naming areas gives the model a plan instead of a vague goal.
- Realism: asking for real anatomy and skin texture pushes away from the plastic, airbrushed look.
- Preservation instructions: the single most useful part of the prompt, as Test 4 showed.
- Motion: gives a video model something specific to animate.
- Camera: a simple camera move keeps the shot intentional.
Subtle, Athletic or Bodybuilder? Choosing the Right Transformation
| Style | Best for | Prompt direction |
|---|---|---|
| Subtle definition | Portraits | Light muscle tone |
| Athletic | Social content | Balanced shoulders, arms and core |
| Fitness model | Promotional visuals | Strong definition |
| Bodybuilder | Memes, dramatic videos | Exaggerated mass |
| Fantasy superhero | Entertainment | Intentionally unrealistic |
If photorealism is the goal, athletic transformations are usually easier for AI to render convincingly than extreme bodybuilding ones. Exaggerated mass leaves more room for anatomy and lighting errors.
Turning a Muscle Photo Into a Transformation Video
A video needs an actual transition, not just a muscular last frame. Here is a simple five-second sequence:
- 0 to 1 second: original physique
- 1 to 3 seconds: shoulders and arms gradually develop
- 3 to 4 seconds: chest and core definition appear
- 4 to 5 seconds: the subject flexes naturally
- Final moment: a short camera push-in
Gradual changes look deliberate. An instant body swap looks like a glitch.
This is where an AI video workflow like Pixwith felt more interesting to me than a conventional muscle photo filter. Instead of treating the muscular version as the final image, I could plan the whole transformation as a single shot.
Three Muscle Transformation Scenes Worth Trying
1. Office-to-superhero transformation
A normal office worker looks at the camera. The sleeves slowly tighten, the shoulders expand and the camera pulls back. It works well for humorous Shorts and Reels.
2. Gym mirror transformation
The subject stands in front of a gym mirror and gradually becomes more athletic. The reflection has to stay in sync with the person. That makes this a much harder consistency test than a single-subject shot.
3. Before-and-after cinematic reveal
The subject starts in casual clothing while the camera orbits slowly. The body gradually gains definition, and the shot ends with controlled lighting on the shoulders and arms. This one shows what video generation can do that photo manipulation can’t.
Five Mistakes That Made My AI Muscle Results Worse
- Asking for “huge muscles.” It’s too ambiguous, and the model fills in the blanks with extremes.
- Starting with crossed arms. The model can’t clearly work out the anatomy underneath.
- Using oversized clothing. Baggy layers hide the body structure the model needs to read.
- Changing the body and the environment at once. Asking for a new gym, new clothes, a new pose and a new physique in one generation multiplies the inconsistencies.
- Overloading the prompt. Longer isn’t better. I got the best results by prioritizing in this order: identity, physique, preservation, motion, style.
What Source Photos Worked Best?
Better inputs:
- Three-quarter or full-body shots
- Visible shoulders and arms
- Simple backgrounds
- Even lighting
- Reasonably fitted clothing
- High-resolution photos
Harder inputs:
- Crossed arms
- Oversized coats
- Extreme side poses
- Multiple people
- Heavy shadows
- Partially hidden torsos
Most tools say “upload a clear photo.” The reason it matters is that the model needs to see where the shoulders, arms and torso actually are before it can change them. Several current generators also recommend clear body visibility and controllable muscle areas.
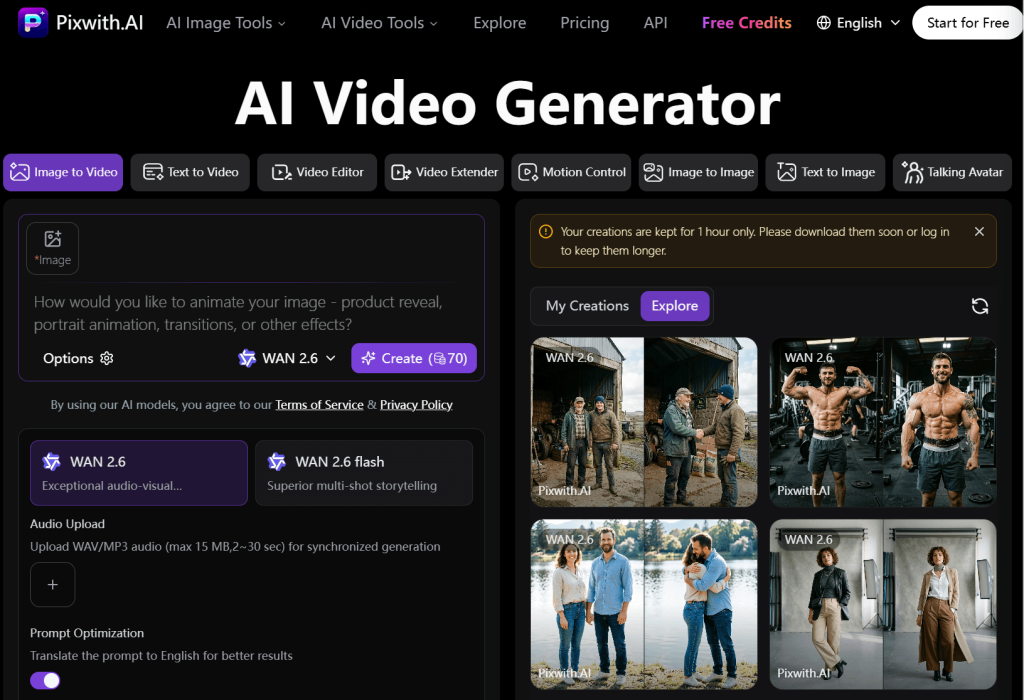
How I Would Use Pixwith for the Workflow
- Choose a clear source image.
- Open Pixwith and select the image or video generation workflow that fits your goal.
- Describe the physique in specific terms instead of just saying “add muscles.”
- State exactly what must stay unchanged.
- Add simple motion, for example: slowly flexes both arms while the camera pushes forward.
- Generate several versions.
- Compare them for face consistency, anatomy, clothing, lighting, background distortion and motion.
- Keep the most believable version, not the most muscular one.
A Simple 6-Point Quality Test for AI Muscle Images
To stop judging results by gut feeling, I started scoring each generation with six yes/no checks. I call it the Identity, Anatomy, Fabric, Lighting, Scene, Motion check.
- Identity: Does the person still look like the source photo?
- Anatomy: Are the body proportions physically plausible?
- Fabric: Does the clothing react naturally to the new shape?
- Lighting: Do highlights and shadows match the original scene?
- Scene: Did the background stay straight and stable?
- Motion: If animated, does the transformation happen smoothly?
A result that passes all six is usually ready to use. One that fails two or more usually needs a new prompt, not another regeneration of the same one.
AI Muscle Generators Are Visualization Tools, Not Fitness Predictors
An AI-generated physique doesn’t predict how your real body would respond to training. Actual results depend on training, nutrition, genetics, recovery and body composition, and no image model accounts for those.
Use generated transformations for entertainment, creative visualization, character concepts, social content and storytelling. Don’t present them as guaranteed fitness outcomes. YouCam makes a similar point, cautioning that AI muscle visualization shouldn’t be confused with real results.
If a realistic edit could be mistaken for genuine progress, label it as AI-generated. It keeps things honest for anyone who sees it.
Final Takeaway: Realism Comes From Constraint, Not Bigger Muscles
After testing all four approaches, the biggest improvement never came from asking for more definition; it came from telling the AI what not to change. Good AI muscle generation isn’t “give me bigger muscles,” it’s closer to “change the physique while preserving everything that makes the original image believable.” For creators who want to go beyond a static muscle filter and try actual transformation shots, Pixwith offers a practical way to turn that idea into short AI-generated visual sequences.
Create Your AI Muscle Transformation with Pixwith
FAQ
What is a free AI muscle generator?
It’s a tool that uses generative AI to change how muscular a person looks in a photo or video. Some only edit a single image, while others create a full transformation clip.
Can AI add muscles to my photo?
Yes. Upload a clear photo, describe the physique you want, and the model reinterprets the shoulders, chest, arms and core. Results are better when the photo shows your body clearly and the prompt is specific.
Can I create an AI muscle transformation video?
Yes. Video-capable tools can animate a gradual change from the original physique to a muscular one. Describing the transition and a simple camera move helps.
How do I make AI-generated muscles look realistic?
Ask for a moderate change, name the muscle areas, and list what must stay the same, including face, clothing, lighting and background. Athletic builds usually look more natural than extreme ones.
What prompt should I use for an AI muscle generator?
Follow this structure: subject, transformation magnitude, target muscles, realism, preservation instructions, motion and camera. The example in the prompt formula section shows how it fits together.
Can I choose which muscles the AI changes?
Often, yes. Naming specific areas such as shoulders, biceps or chest in the prompt gives the model a clear target. Tools differ in how precisely they follow that instruction.
What type of photo works best for an AI muscle generator?
A sharp, high-resolution, three-quarter or full-body shot with visible shoulders and arms, fitted clothing, even lighting and a simple background.
Can an AI muscle generator show what I will actually look like after training?
No. It creates a visual concept, not a forecast. Real changes depend on training, nutrition, genetics, recovery and body composition.