
Video marketing has become an essential part of digital success and growth. Recently, the barrier to entry into the market was a minimum budget of $10,000+ and a few months of intensive training on an editing suite.
However, thanks to AI-free video generators and open-source models, the time and cost required to make a video have been slashed down to a few minutes.
Before, it was nearly impossible to think about this type of creative without hiring a person to operate footage, audio, lighting, and editing. Now, it is within anyone’s reach to produce high-quality studio-style content without even knowing how to edit a single clip. The days of expensive video production are behind us, and our ability to create video content has become limitless.
Below is an exact step-by-step guide to creating videos with a free AI video generator online that you can implement immediately.
How AI Video Generators Work?
Learning about a technology before utilizing it is crucial to understanding its full potential, and AI video generators are no exception.
Behind every single one of those AI-generated clips is a foundation model trained on millions of annotated frames. That training data includes what objects and scenes persist over time; how lighting and perspective change; and how cameras behave in different situations – and it learns all those patterns through supervised learning. Then, from a new piece of text, it can generate a coherent video that looks like it should.
That text gets turned into a prompt, then split down into smaller chunks – and each of those gets encoded as a semantic embedding of the meaning. A diffusion or transformer model then interprets those embeddings to figure out what’s in each image frame and where things go next. Finally, by interpolating from each still frame to the next, the still images turn into a sequence of moving pictures.
Once the video is all rendered out from prompt to frame to moving sequence, the system itself then stitches it all together. It adds in spoken audio with matching timing, scene cuts, and background music that matches the mood and pacing of the scene. Finally, it automatically aligns the three tracks – voice, motion, and music – into one final video file.
Now that you have a basic understanding of how AI video generators work, let’s dive into how to actually use one to create your own video content that looks and feels like a professional production minus the hefty price tag.
Create Videos with a Free AI Video Generator in 5 Simple Steps
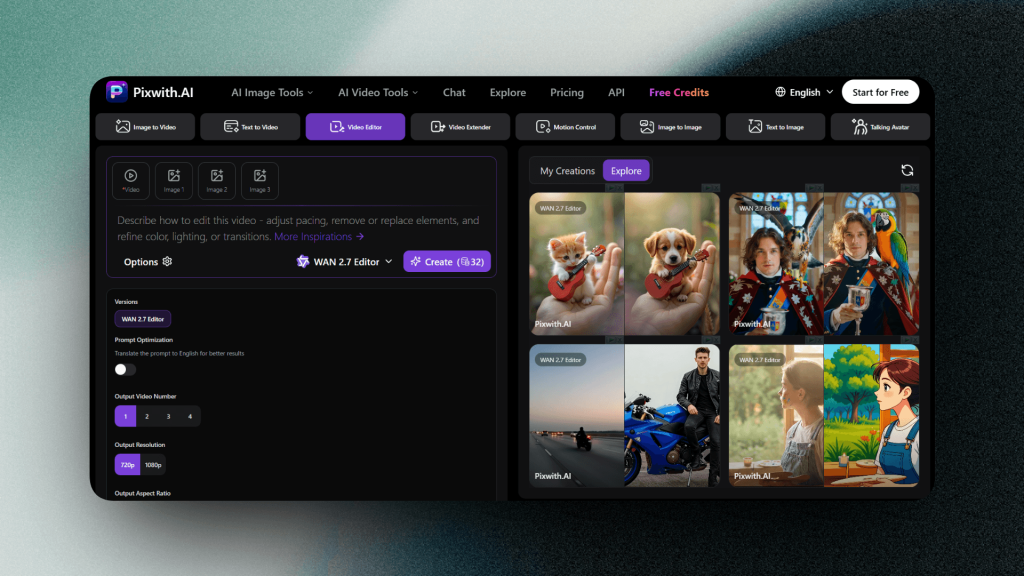
Creating an AI video for the first time is a fair undertaking. We’re seeing more AI video tools come out and allow anyone to create amazing videos, even for those of us who aren’t coding or graphic design experts. For the sake of this guide, we’ll use Pixwith.ai’s dedicated AI video editor tool to make a first-time AI video.
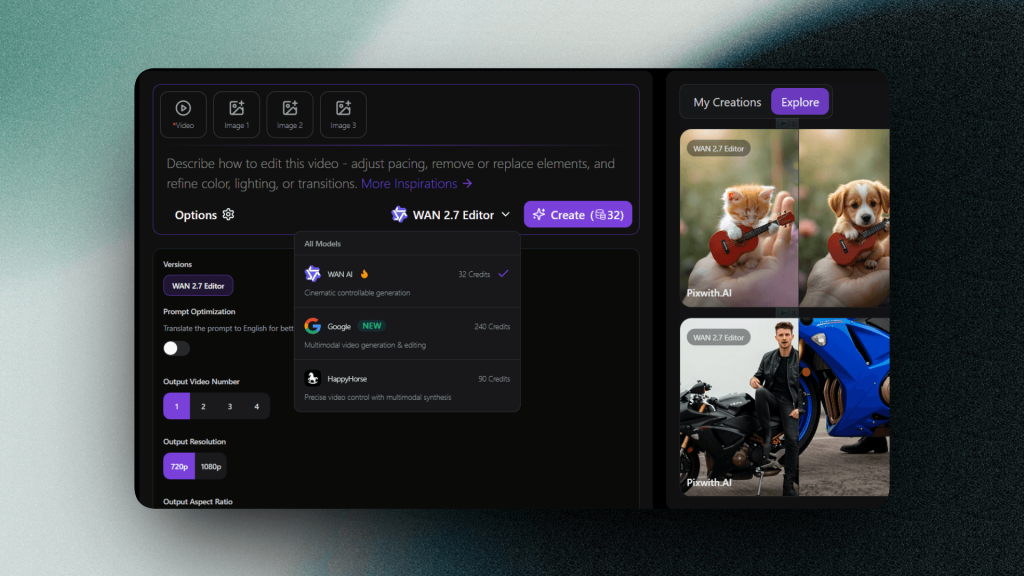
First-time users of the tool will notice that there are three different AI video generation models at their disposal. Each of these tools will give a different kind of output, meaning you can match the style to the needs of the project.
In the following sections, we’ll go through each and explain how to create a perfect video with minimal effort.
#1. Choose Your Video Generation Model
Choosing the best model to work with is the first important step in becoming an AI video creator. Depending on what you want to make and what your budget is, each of the three models described below can be ideal. Here is a quick preview of them.
WAN AI is relatively inexpensive, and results can be quite cinematic. The ability to precisely control the artistic direction on a generation-by-generation basis is part of what makes this such an appealing option for a less expensive entry point.
Google’s latest model is best suited to more complex generations, or to modifying and editing existing footage. The cost per generation is much higher at 240 credits. This model also has the ability to do true multimodal generation – a much broader technological capability than the other two.
HappyHorse provides a means for users to have precise control over the multimodal output of a video generation and also costs 90 credits per generation.
#2. Upload Your Source Video or Images
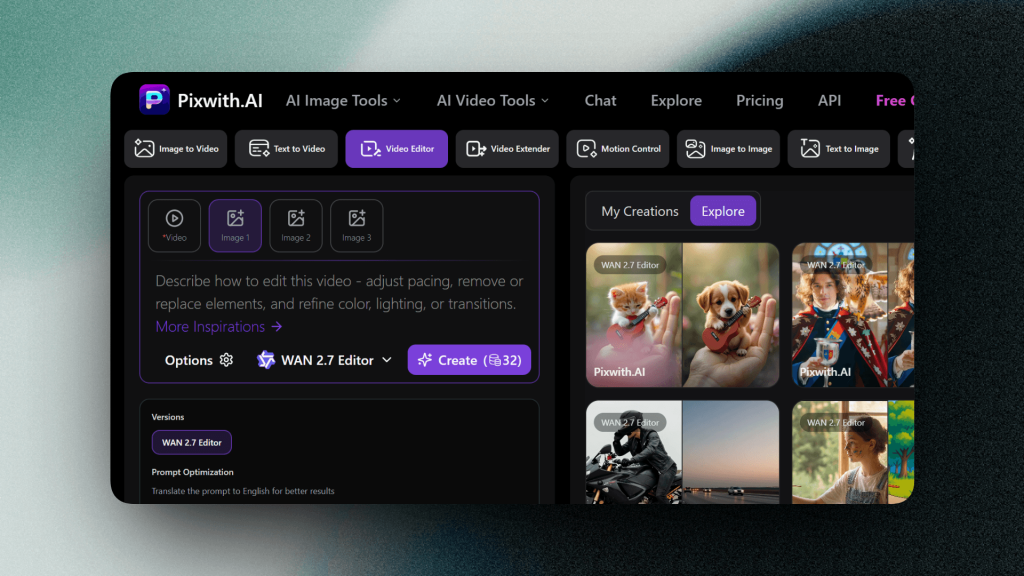
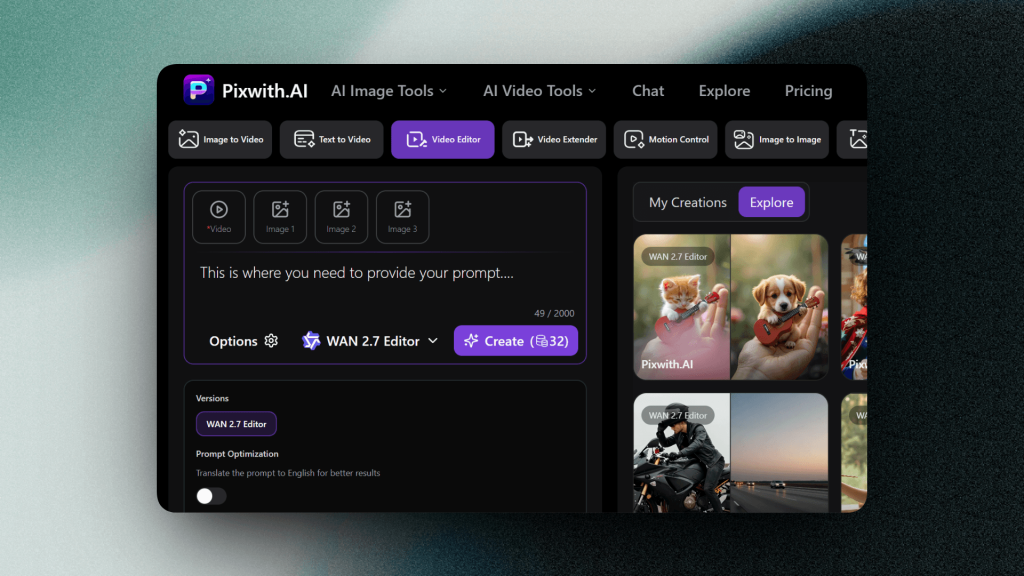
The second step in the process of creating your very first AI video is uploading. It begins with inputs: a raw source that can be either video or images and text. The combination of these defines the creative direction of an AI video generator. In the end, you get a customized video output that’s hopefully as close as possible to your vision of the final result.
What you upload can be video or images that will serve as a reference to define the look and feel of the generated content. In the case of video, the tone and the general visual style are immediately set, while the input of images defines a set of visual elements. The app allows you to upload a maximum of three reference images at a time, or you can go for the video option. What you upload becomes the aesthetic baseline of the final output video.
When selecting the images you want to upload for your very first AI video generation, they need to be the starter point for the look you want to achieve. They should be representative of the overall aesthetic you’re trying to define with your video. Above all, keeping the visual direction consistent throughout an AI-generated video will lead to a stronger outcome.
#3. Write and Refine Your Prompt
The thing that matters most when you make your first AI video is your text prompt. Everything else in the process follows from your text. Your prompt defines the pacing and tone of your video, and the amount of detail.
Here’s what you need to write in your prompt. The instruction should describe the editing actions you want to take: changing the pacing, or the types of transitions.
Then it should explain exactly what you want to remove, what you want to replace, and what you want to refine within the video. It also provides simple cues that let the AI know where and when to incorporate colors and lighting cues into the video.
#4. Fine-Tune the Output Settings
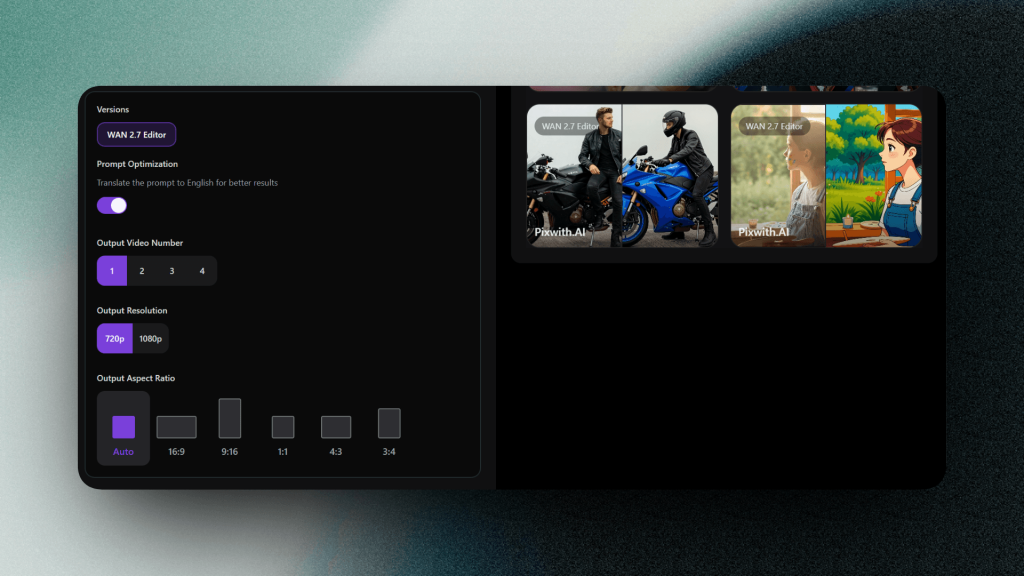
The output settings panel is where you shape how the final video will be created. It’s always wise to spend a moment here to make sure the output matches your intent. You can configure several options here, including prompt optimization, number of output videos, resolution, and aspect ratio.
Prompt Optimization
Turn this on if you’re not a native English speaker. This feature auto-translates your prompt so that the AI understands what you’re asking for.
Video Count
Select how many videos you’d like to generate at once (up to four). Keep in mind that generating multiple videos at once will consume your free AI credits – so be wise as you choose!
Resolution
Choose whether your video will be generated in 720p or 1080p resolution. Select based on what output quality you’d like to produce. There are no other resolution settings available.
Aspect Ratio
Choose an aspect ratio from the listed presets: auto, 16:9, 9:16, 1:1, 4:3, 3:4. If unsure how to choose, select auto – this will let the system adapt the video ratio to the content you input. If you have a particular platform in mind (and need your video in a specific ratio, such as widescreen or vertical), choose the matching aspect ratio.
#5. Generate, Preview, and Export
One click makes every little setting and detail you’ve added into a finished clip. Hit create and let the model do all the hard work to render your clip.
Preview what you’ve got so far. Tweak the final few settings if you want to!
Once you’re happy with what you’ve got, click download to get the final version. Your clip is all set to go!
Final Verdict
AI video generation has matured from a novelty tool to something genuinely useful and impressive in the right hands. And though the technical ceiling keeps going up (and I won’t be surprised if it eventually shoots to the stratosphere), but the entry point is better than ever before.
The easiest place to start hands-on is pixwith.ai. Sign up, pick a model, and make your first prompt into an actual video today.