
The 15-second video you thought would be a quick one.
It starts with a simple idea that seems easy enough. But then you realize video-making involves scripting everything, gathering all the footage, setting up the camera with good lighting and composition, editing in the transitions and music, and exporting the finished work. And before you know it, you’ve filled every spare moment of the day, and your opening doesn’t hook like you hoped. So you start over.
That’s the whole point of AI short video generators – to shortcut the process of turning a good idea into a great video. You can test and refine your concept with each generation before spending time creating more polished versions. And that’s exactly what Pixwith delivers with its unrivaled free AI short video generator.
Keep in mind each generation is just a draft, not something you need to spend hours editing to make perfect. The faster you can make changes based on trial and error with each generation, the better. That’s how you perfect your message and your video. And with Pixwith you get to accomplish all these for free.
Most People Are Using AI Short Video Generators Backwards
For short video creators, the most common workflow we see with current AI tools is something like:
prompt → generate → download → post
And while this process can work, it’s not often the most effective one. Usually, the first AI output you get isn’t the best visual idea you came up with.
There’s a lot more you can do with AI videos and more power in your visual direction if you take a different, iterative approach to video generation. Try something like:
prompt → generate → evaluate result vs. your plan → change one visual variable → generate again
Always evaluate your result before deciding what to change. And always only change one visual variable at a time so that you are certain of its impact.
Once you understand the impact of a tweak, you repeat the process. Keep doing this until your visual direction of choice is ultimately working. Once your visual direction of choice is working, then you can leverage your AI video generator’s post and export tools to generate your final AI video.
Think of your AI video generator not just as a video production tool, but also as a visual prototyping tool a design testing ground for figuring out what visual directions you want to pursue in your final video.
What You Actually Want From a Free AI Short Video Generator
Can you test an idea without building an entire production?
The best short video creators don’t waste time and resources trying to bring an idea to life only to learn that conceptually, visually, or tonally it was flawed.
What would help is the ability to generate a quick visual draft before filming, editing, and full production took place. This enables you to see the concept realized and develop an overall sense of its visual direction first.
Then, in the very next iterations – just a few generations away – you’ll decide whether to move forward with it or not, sparing yourself lots of wasted effort on ideas that do not work visually.
Can you turn a still image into something worth watching?
From fashion photography sessions to digital art to digital product samples, there are a lot of still images out there. One of the best ways to make use of your stills library without rewriting your content strategy is to turn a static image into a short video.
The right AI video generator will animate a still image to give it natural movement, and in doing so, create a sense of visual progression that turns it into something worth watching.
This also means you can evaluate whether a given still image can become a short video concept before committing to creating that video from scratch.
Can you describe camera movement instead of manually animating it?
One of the most technically-intensive parts of short-form video production is creating realistic camera movements. Taking on the role of camera director requires either an experienced editor or a robust set of animation tools, neither of which beginners usually have access to.
A faster and more efficient way to create realistic, cinematic short-form video involves describing what should happen with the camera in your prompt. You could describe as simple a movement as zooming in or going wide. Or use more descriptive language to specify a complex camera movement, such as panning across or tracking a subject, or more elaborate cinematic camera motion based on the movie scene you have in mind.
Can you experiment with different visual directions quickly?
As a creative, whether you’re new or experienced, there’s always that moment of doubt right before pressing the record button: Was that the best visual idea for the content? Would it work better with a different camera angle, motion, style, lighting, or composition?
The best AI video generators allow you to generate multiple variations of the same core idea. You don’t have to design, storyboard, or film each of them and only then compare which one works best. Generate the first, look and think about what could be changed to improve it, generate another one, experiment further, and so on.
Can you create clips suitable for Shorts, TikTok, Reels, and ads?
Short-form video content was created for social media apps that feature short-form video.
Therefore, the best AI video generators consider vertical and short-form formats right out of the box. This makes it easier for creators to quickly test whether a clip you’ve generated has enough visual impact to resonate with the audience who uses platforms with short attention spans.
You can also explore different creative versions of the same idea to generate ideas for both your next organic video or next TikTok ad campaign.
How much control do you retain when the first generation isn’t right?
It’s tempting to assume that if the first generation of your AI clip doesn’t do it right, you just “start over” and try to reimagine the whole concept. But with a powerful AI video generator, this needn’t be the case. Instead of starting over from scratch, you can change specific elements of the generation and see what the alternative looks like.
It could be tweaking elements of your prompt, changing the type of motion, or varying other variables like composition. This allows you to treat each generation as a draft to be iterated on rather than a final product to sit or toss.
My Five-Prompt Test for Any AI Short Video Idea
To give a fairly comprehensive idea of how small changes in your prompt can drastically change the end product of your AI short video, I’m going to walk you through my five-prompt test for AI short video ideas. As I outlined above, the idea we’ll focus on throughout this test is a tired office worker notices running shoes and bolts out the door. What we’ll do throughout these five tests is keep the concept the same and change only one variable each time. Here’s how that will play out.
Test 1: The Basic Prompt
For our first test, we’re going to keep it simple. We’ll give our AI short video generator a minimal description of our concept and ask it to generate the video.
Example prompt:
A tired office worker sits at her desk late at night. She notices a pair of running shoes beside her desk, puts them on, and runs out of the office.
This gives us our baseline. There is no specific camera movement, lighting direction, opening action, or detailed story structure. We’re simply describing what happens.
Test 2: Change Only the Camera
For our second test, we’ll take the same simple prompt as in Test One and add a bit of camera movement to see how that changes the tone and emotion of the shot. So let’s go with a very simple shot description: Slow handheld push toward the woman’s face.
Example prompt:
A tired office worker sits at her desk late at night. She notices a pair of running shoes beside her desk, puts them on, and runs out of the office. Slow handheld push toward the woman’s face as she notices the shoes.
Notice that we haven’t changed the story itself. The woman is still tired, she still notices the running shoes, and she still leaves the office. We’ve only changed how the camera observes the moment. That small addition can make the shot feel more intimate and emotionally focused.
Test 3: Change Only the Lighting
For our third test, we’ll do almost the same thing as in Test Two, but instead of changing the camera setup, we’ll change the lighting direction. Let’s try with this: Warm golden-hour light entering through the office windows.
Example prompt:
A tired office worker sits at her desk late at night. She notices a pair of running shoes beside her desk, puts them on, and runs out of the office. Slow handheld push toward the woman’s face as she notices the shoes. Warm golden-hour light entering through the office windows.
Again, the basic action remains exactly the same. We’re not changing what the woman does or how the camera moves. We’re simply changing the lighting. This can completely shift the visual mood of the same scene, making it feel warmer, more cinematic, or even more hopeful.
Test 4: Change the Opening Action
Our fourth test will be similar to Tests Two and Three. We’ll take the prompt from Test One and change only one of the variables. In this case, we’ll change the action the woman is performing when the screen first enters our focus. Let’s try with a very simple change: The running shoes unexpectedly slide into frame.
Example prompt:
A tired office worker sits at her desk late at night. The running shoes unexpectedly slide into frame beside her desk. She notices them, puts them on, and runs out of the office. Slow handheld push toward the woman’s face as she notices the shoes. Warm golden-hour light entering through the office windows.
The overall idea is still unchanged, but now the video has a more active opening. Instead of simply beginning with a woman sitting at her desk, something immediately happens in the frame. This small change can make the opening feel more dynamic and give the viewer a reason to keep watching.
Test 5: Add a Mini Story
For our last test, we’ll take our original prompt from Test One, but this time, we’re going to add a bit of narrative to the clip. Let’s structure the clip as follows: 0–2s: Frustration, 2–5s: Discovery, 5–8s: Decision, 8–12s: Movement/payoff.
Example prompt:
A tired office worker sits alone at her desk late at night, looking frustrated and exhausted. The running shoes unexpectedly slide into frame beside her desk. She notices them and slowly looks down. Slow handheld push toward her face as her expression changes from frustration to curiosity. Warm golden-hour light enters through the office windows.
0–2s: Frustration — she sits at her desk, exhausted from work.
2–5s: Discovery — the running shoes slide into frame and she notices them.
5–8s: Decision — she looks at the shoes, puts them on, and decides to leave.
8–12s: Movement/payoff — she suddenly gets up and runs out of the office, leaving the stressful work environment behind.

Now we’re no longer describing only a scene. We’re giving the AI a simple progression of events, emotional beats, and a beginning, middle, and payoff. The core idea hasn’t changed, but the prompt now gives the model much more information about how the short video should unfold.
Once we’ve run through all five prompts, we can look at all five outputs and see just how drastically small changes can affect the overall feel and result of our AI-generated short-form video.
The Most Important Part of an AI Short Isn’t the Prompt — It’s the First Three Seconds
We’ve noticed that too often, too many creators get bogged down focusing on minute details and adjectives in the prompt area. As a result, they often overlook the most crucial part of your short: What happens right when the viewer first sees your video. This is your first three seconds. Because if, for example, those three seconds aren’t visually arresting, then the viewer scrolls past your short and you’re already lost. So drop the pursuit of detailed perfection in your prompt, and let’s talk about this opening three seconds.
Let’s take a look at two examples.
Weak prompt: “A cinematic woman, wearing a tailored blazer and looking smart, standing outside a high rise in an urban office.” That type of thing looks good on paper. What it doesn’t do is give any reason for a viewer to stop scrolling and start watching.
Strong prompt: “Her running shoes suddenly slide beside her desk.” This strong prompt ties three things together: A clear visual event (“her running shoes suddenly sliding beside her desk”), a subject that you can easily imagine (“her running shoes”), and movement (“suddenly sliding”). It’s that final piece, the action, that creates the instant change your brain, as it processes the world, hones in on.
A static scene is nothing for the brain to get curious about: nothing to see here, move along. But an event, even an abrupt one or an unexpected one, begins the process of curiosity instantly. Your job? Design that first clear moment of motion. That is, instead of focusing on what your shot looks like, focus on what happens first. Taking this advice to heart can make your next AI-generated short much more scroll-stopping.
My Short-Video Prompt Formula
Here’s a simple, repeatable framework for constructing AI prompts for short videos. I call it the Short-Video Prompt Formula: Subject + Immediate Action + Environment + Camera + Lighting + Continuity Constraint.
Subject: Who or what appears (i.e., the subject) in the short video.
Immediate Action: What can immediately be seen and heard someone doing on the screen.
Environment: Where the action takes place, and what surrounds it.
Camera: How the camera moves, what angle it uses, or how it frames each scene.
Lighting: What mood the lighting creates (or what hour of day it is in the case of natural lighting).
Continuity Constraint: Elements that must be kept consistent throughout the short video.
You can even write AI video prompts with this simple formula:
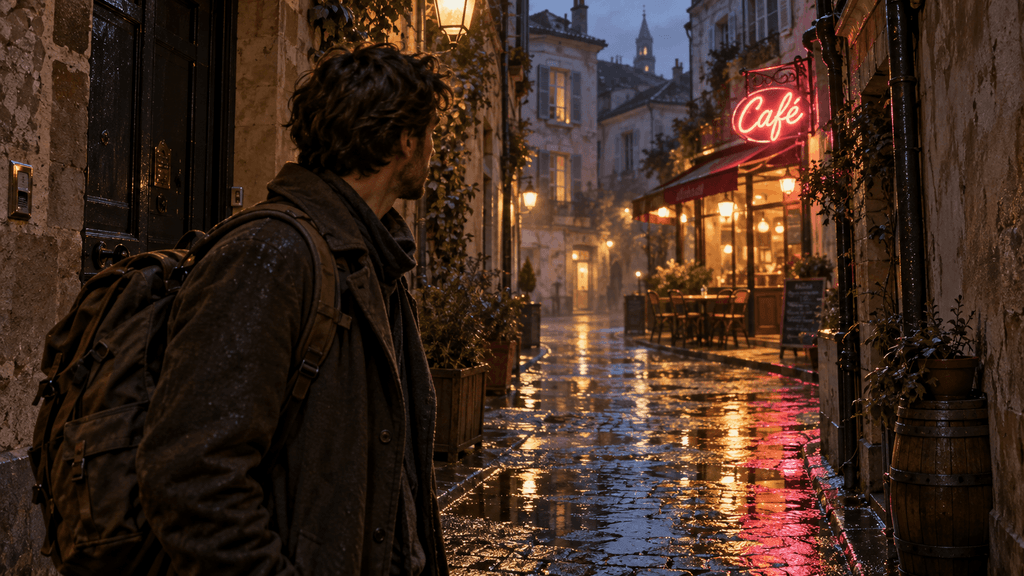
Example: A traveler walks along the ground at a steady pace through an empty alley in a medium-sized town in Europe. A bright neon café sign suddenly flicks on near the end of the alley. The traveler stops in his tracks, then turns to take a look down it, full attention on the newly-opened café sign. You see the scene through a close tracking camera walking beside him. It is a rainy dusk, and the lighting creates a mysterious, magical mood. It is artistic, realistic cinematic photography. The traveler’s appearance and clothing are consistent throughout the short video.
Where Pixwith Fits Into This Workflow
The challenge of connecting video AI tools comes from the interfaces, the conversions, and the hands-on work. Pixwith is the one system that allows you to go from idea to motion without building up an elaborate video production stack, from text to visuals to animation and more. It’s a connective layer rather than a stage-gate tech transfer.
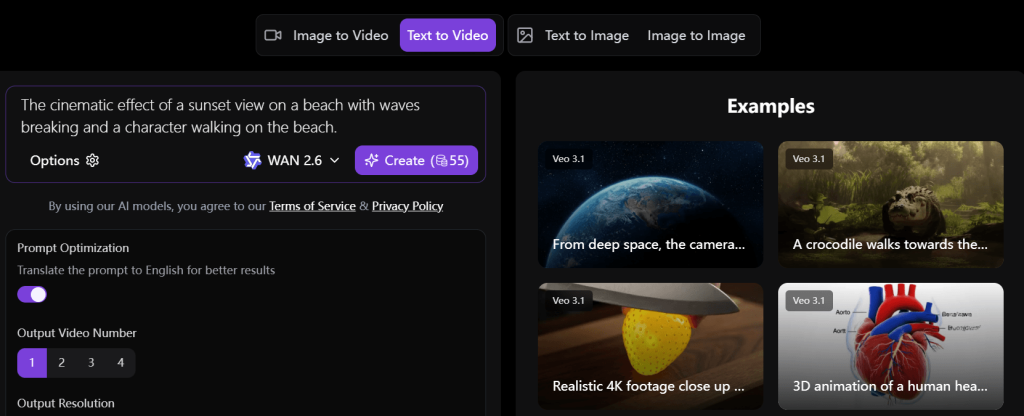
[1] Text-to-Video
When you’re working more in the world of language than in the world of ready-to-use assets, Pixwith is the place where you go from language into motion. Compose a prompt just as you’d describe your idea to a collaborator, and see it transformed into a visual draft before your eyes almost instantly. This way you can see how a narrative develops into motion before you storyboard or produce assets.
Pixwith isn’t designed to push you down a single pathway of “write one prompt, then wait”. It’s designed for a dynamic, intuitive back and forth between you, the idea, and the output, you change a word, you tweak a style setting, you describe a timing cue, and you watch it transform.
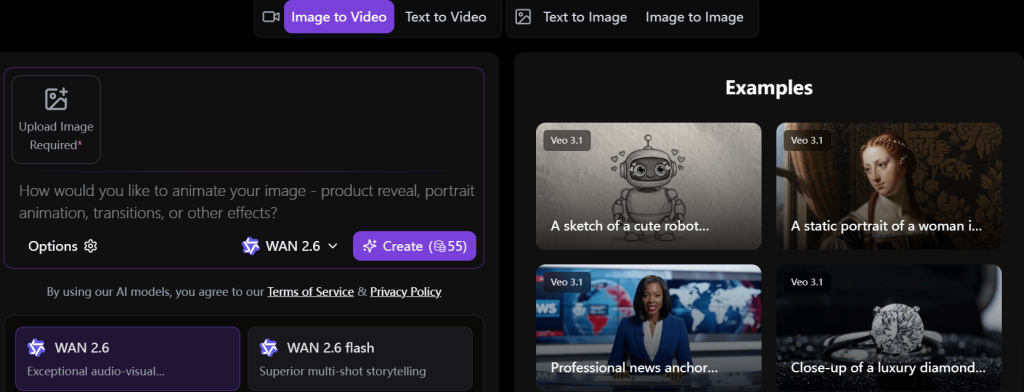
[2] Image-to-Video
You could start with a visual anchor, a character design, product render, illustration, a single keyframe that captures the mood you’re going for. Whatever the source, Pixwith allows you to add it as-is and enrich it with targeted movement, subtle animation, or a total scene transformation, all without leaving the project.
You have complete control over how the elements of a frame evolve over time (fabric in the wind, a character’s emotions changing with the scene, and so on). This unlocks a complete world of visual motion without altering the source style. This is especially helpful if your brand is consistent (i.e. if you must use the same artistic style across all your videos).
By not forcing you to rebuild your pipeline of assets, Pixwith allows you to treat image-to-video as part of your natural creative workflow, not as a separate, time-consuming stage of video production.
[3] Short Creative Experiments
Before you commit to an entire sequence, it’s invaluable to see multiple directions for the motion side-by-side. This is something you can do in Pixwith. It enables you to rapidly test different camera paths, lighting effects, and scene speeds without copying files or rebuilding timelines.
You can create several versions of an idea in the time it would take to do one standard render and then instantly compare them, determining what’s truly the best fit for the idea.
This kind of low-effort experimentation allows you to see which concepts are worth continuing to explore further, before investing significant time and energy into refining it and locking it in.
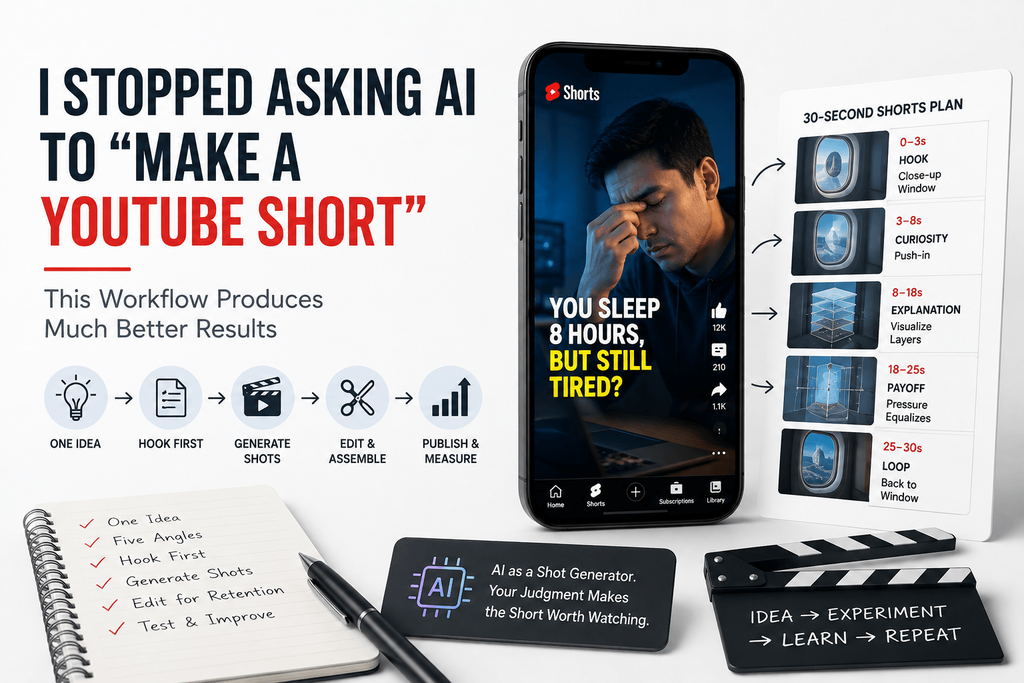
[4] YouTube Shorts
Shorts rely on strong first impressions, and Pixwith allows you to iterate over them before ever hitting record.
You can try out different hooks, test colour palettes, and refine visual metaphors, and build a Short around the best idea, not the best footage.
[5] TikTok Videos
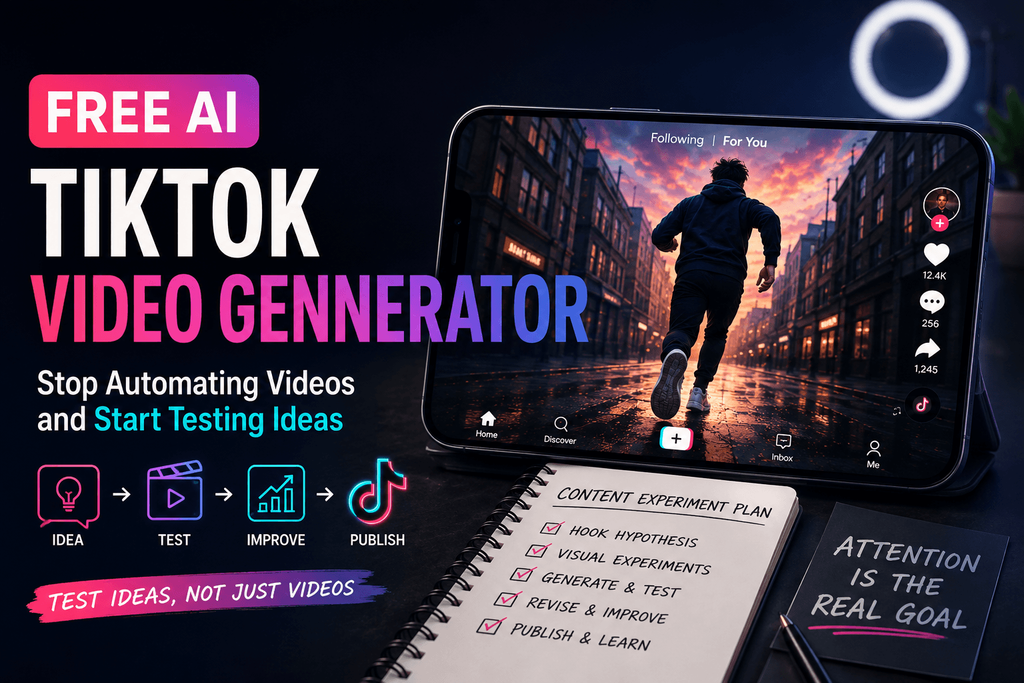
TikTok is all about trying new things and Pixwith makes it easier than ever before. You can generate and test multiple versions of the first second, the key to viewer retention. Surreal, gritty, graphical, animated, cinematic… try anything.
This is the simplest way to test what works without losing hours of video assets or reference material.
[6] Instagram Reels
Reels should look polished and native to the platform, and Pixwith makes it easier to refine the final look.
Tinker with composition, experiment with motion concepts, and see how different visual treatments will affect perceived quality. The generated frames become your creative guide, or your final asset.
[7] Product Demonstrations
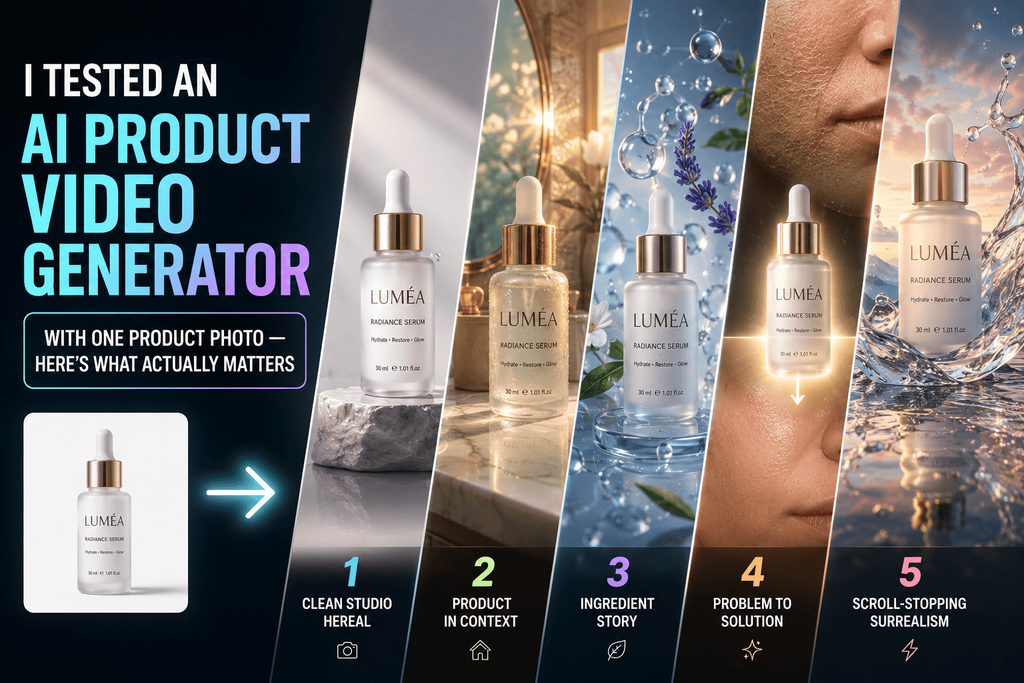
Demonstrating a product’s value is often logistically impossible, expensive or impractical. Pixwith visualises a product within idealised environments, from specific spaces to abstract settings.
You can test camera angles, generate close-ups and experiment with presentation styles, all before making a single production decision.
[8] Advert Concepts
Pixwith is fast enough to allow you to test ad concept directions on the fly. Quickly prototype different visual directions from an ad script in minutes. Lifestyle imagery, bold typography, surreal metaphors, test out any direction with instant feedback.
Instead of a mood board or a written brief, you can simply present your options in a visually meaningful way to get real feedback.
[9] Faceless Videos
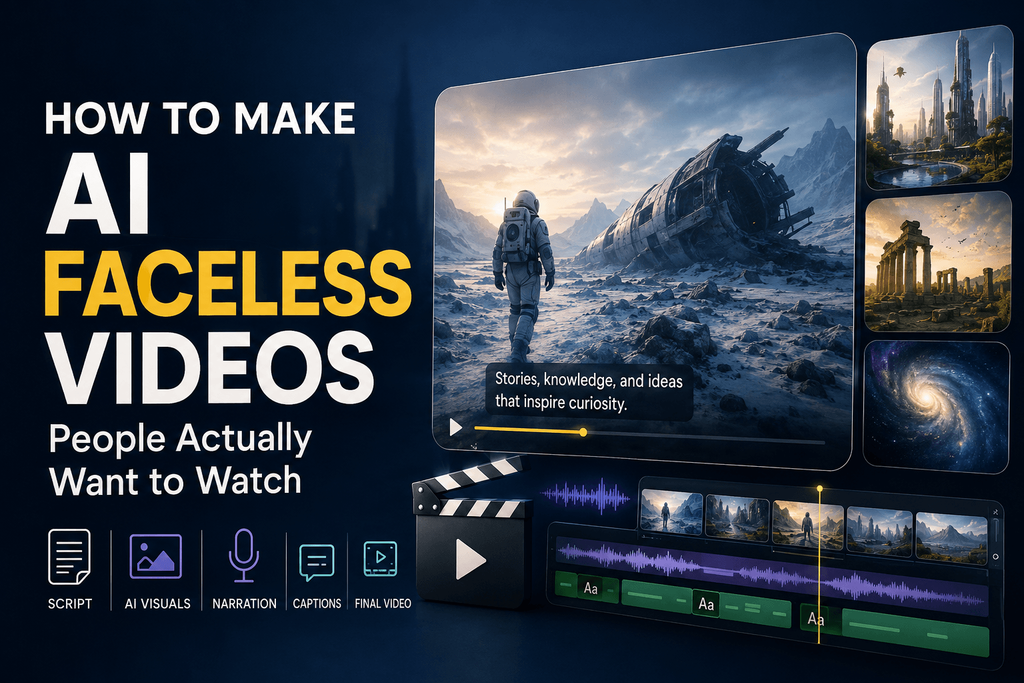
Sometimes you don’t want people to see your face, and Pixwith makes it easy to produce compelling content without your face. Generate scenes that visualise your narration. Create your signature visual motif to make it your channel brand.
Build sequences that feel deliberately crafted, rather than cut from generic footage. Let your voice tell the story, while Pixwith generates the world in which it takes place.
[10] Story Clips
Creating visual stories from a narrative usually requires major resources. But, with Pixwith, you can generate sequential scenes to test out character placement, environment, camera movement and rhythm.
Visualise different visual treatments and see how they affect a story’s pacing, mood and energy. Your simple story outline becomes a visual storyboard you can watch.
[11] Educational Visuals
Complex ideas are easier to explain when they’re shown. Pixwith allows you to generate visuals that perfectly match your teaching point. Generate scenes that visualise abstract processes, comparative images that highlight the differences, and prototype examples that help with teaching.
Every educational creator knows the frustration of stock footage that almost, but not quite, illustrates the concept. Pixwith removes the compromise.
[12] Promo Videos
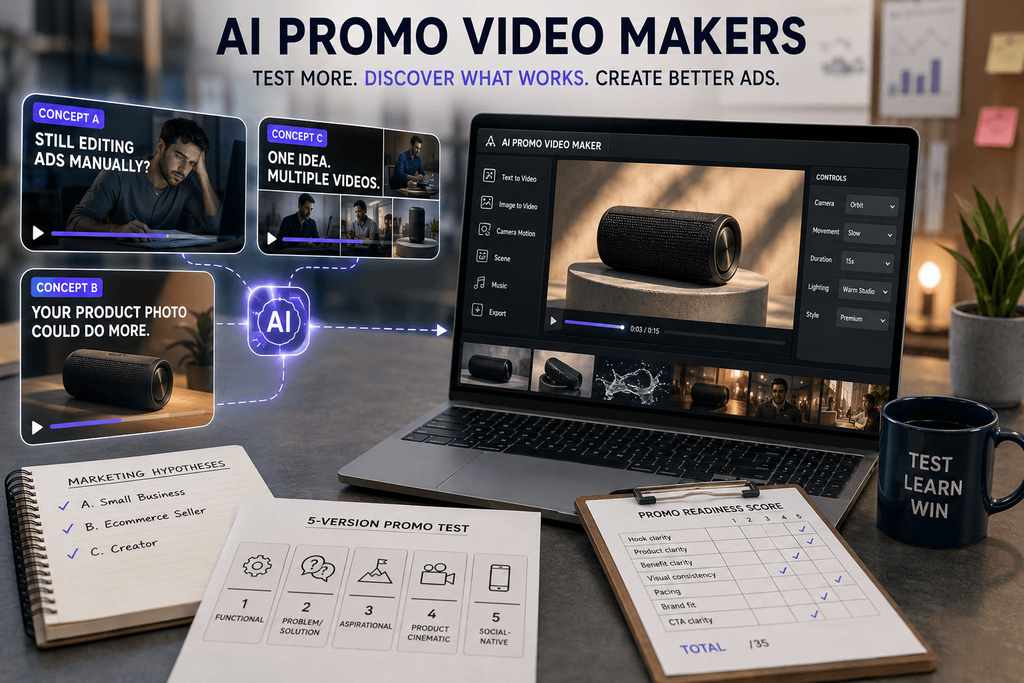
Promotional content needs to catch attention and communicate value quickly. With Pixwith, you get the bandwidth to explore multiple approaches all at once. Generate opening scenes using different emotional appeals, test product hero shots with different levels of drama, generate variations for different audience segments… The final creative decision is made from real exploration, and not “the first thing that’s doable”.
The difference is that Pixwith puts you in the director’s chair when it comes to generative visual exploration, and allows you to fly free of the limitations of stock libraries and the things that are realistically shootable on any given day. You’re no longer limited by what can be created and what can be shot.
You are, however, limited by the number of variations you generate. Short-form content doesn’t start from logistical compromise, it starts from creative ambition. Every format can have its own visual signature and help you stand out from the crowd.
Three Short Videos I Would Test First With Pixwith
Run these quick experiments to get a handle on the generator, what it can do, and where it might be pushed to deliver results. The three video concepts are tightly focused, repeatable, and designed to test one core function at a time. Running them in order, you’ll build the mental models required to start making motion stability, narrative clarity, and merging your assets with generative motion, in under an hour.
Experiment 1, Product Reveal
Start with a high-risk shot, where you’ll immediately see it if the AI doesn’t deliver. This prompt centers a matte-black wireless speaker perched on a concrete pedestal. As the camera makes a slow, clockwise orbit around the speaker, the warm light slowly travels across the speaker’s grille in the same direction.
In this test, you’re evaluating the motion stability of your product, its uniformity throughout the sequence, and how cleanly the camera travels around your subject. When watching the render, be on the lookout for your product’s silhouette. Is the grille pattern, edges, and shadows consistent throughout the camera move? Remember, while the generator is designed to keep your product’s shape between frames, this test serves as a highlight of this strength, or suggests that a more simply drawn arc might better suit your brand’s visual rules. A clean, unbroken light sweep across the surface, without any mesh distortion, ensures your product will reliably perform in hero loops, social teasers, and e-commerce placements that require perfect results.
Experiment 2, Micro-Story
Now, shift the story away from a product, and focus on a human moment. In this case, a traveler walking through an empty, rainy alley. A dark café sign suddenly lights up and the traveler stops to face the glowing sign.
Beyond individual frames, this test goes deeper than just one shot. You’ll see that the opening hook sets up the tone and tension within the first second. At the same time, you’re looking to ensure that the traveler’s coat, gait, and silhouette are consistent throughout the moment the camera captures. The rain, wet pavement, and glowing sign should look seamless, rather than forced. Lastly, watch the edit without text or voiceover to see if it clearly and simply tells a story. Your viewer should understand that the café sign changed the character’s route and objective.
This cause-and-effect visual grammar works beautifully within the generator. If your render looks good, you know your AI can create brand stories with emotion-driven reasoning, rather than just aesthetic ones.
Experiment 3, Image-to-Video
Third, test with your total creative input. Start with a powerful, still image you already love, be it a photograph, a 3D render, or even a concept frame. You’ll use Pixwith’s image-to-video pipeline to animate it and, more specifically, do so with restrained motion. Add subtle subject movement. Add one layer of background motion. Add one camera movement. To give you an example, we’ll stage a product on a table. You’ll add a slightly breathing background curtain, and a slow dolly-in.
Often, controlled, limited motion looks much more realistic than asking the AI to animate all elements at once. This test is in the spirit of enhancing the source image, rather than placing complete reliance on the AI to create a full scene. This test, in particular, highlights how Pixwith uses AI as a subtle motion designer. AI will extend your static assets into living, breathing micro-content that feels 100% your own.
What AI Still Gets Wrong in Short Videos
As already discussed, AI-generated short video is an exciting new frontier of creative possibility, transforming what used to require an entire production team and hours of filming into a compelling short clip in a few minutes. Unfortunately, AI short video generators often don’t work on the first try, operating at a technical limitation. The sooner you recognize where they break, the sooner you’re on your way to a reliable creative workflow. Being aware of predictable failure points can help avoid unsuccessful prompts and take full advantage of the model’s capabilities.
Here are the most common pitfalls in using AI video generation tools to better take control of your creative process.
Character Consistency
We rely on our human actors to maintain a consistent look (face, jacket, haircut, etc.) between shots and videos, but AI models have trouble keeping that look stable from frame to frame within a clip or between different clips. They’ll inadvertently alter their jawline, the color of their collar, or the part in their hair, breaking your immersion in the content within a few seconds of a short-form video.
Getting character consistency to work is not a tickbox setting, it requires building it into your design. Strategies for achieving the best results include keeping the number of characters low, keeping their descriptions minimal, and, and this is a big one, reusing the same seed or image for a consistent base.
If your character needs to appear in multiple clips, plan your shoots to allow you to curate the clips and fine-tune the results. Alternatively, try featuring the character at an angle where you can avoid a too-close alignment of the face.
Object Geometry
Products, props, and architectural details will often shift shape when you move the camera. A bottle will gain extra facets, and the table’s edge will bend and snap. This is because AI video generators build their output based on patterns rather than a 3D scene. There’s no internal way to ensure that objects keep their form.
This is a major consideration for product teasers, explainer videos, or any content where the object is the star of the show. From a design perspective, you’ll get much better results if you adhere to the model’s comfort zone and keep your object from moving. If you must give your hero object some motion, keep it simple and predictable, choosing simple and gentle arcs of movement, rather than complex and busy ones. If you want to spice things up a bit with a complex reveal, you could instead generate the shot in parts and stitch the best bits together.
And above all, accept that your object will never be truly stable in complex motion sequences. You’ll be much happier to abandon the idea of a perfectly smooth 360-degree rotation than chasing perfection and wasting time.
Excessive Motion
Despite being capable of great things, AI video generators can fall into an uncanny valley if you have too much going on. Limbs will seem to pass through one another, and the frame will lose its cohesion. The reality is that feeding the model too many independent motion vectors will drastically reduce the chance of a coherent frame over a short clip.
Stick to single dominating actions at a time. If you want a complex camera motion, make the subject static. If you want a complex subject motion, make the camera motion simple. Your results will have a clean, engaging look that’s great for social media, and you can add energy later via editing and sound design, rather than trying to force intricate choreography on the model.
Physics
It’s incredibly hard to control any video generation AI model when it comes to moment of interaction between hands and objects, pouring liquids, fabric in the wind, or when different moving objects collide.
You’ll notice hands with six fingers, cups that pass through palms, or water splashing that then appears to reverse. This is because the model does not have access to a physics engine, so it simply mimics physical actions, ignoring conservation of mass, momentum, and contact.
If you have to have your product handled by hand or a liquid being poured, plan to explore the space and experiment over a series of iterations to find the sweet spot. You’ll have to be very specific in your prompt to narrow down your action into the tightest, most unambiguous slice of the action.
The best results will be from a selection of candidates, where the action is short and possibly obscured and does not require the model to simulate an entire mechanical sequence.
Prompt Interpretation
Even the best prompt can still be misinterpreted by the model. It will see what you didn’t mean to highlight, or ignore the main subject entirely. It will be great at combining adjectives, but not so good at disambiguating them. After all, this is the nature of the beast: the model is trying to link written language to a vast array of potential pixel arrangements, so your intended meaning is just one possible path to take.
The answer is not to generate longer prompts; the answer is to generate shorter, more precise prompts. If the model has lost the thread, pick the subject and the action apart and test them independently. If your subject is missing, test that they are included without the action. Add it in once you’re happy with the subject.
Practical Response: Simplify, Isolate, Regenerate
When you discover a limitation, treat the output as a diagnostic rather than seeing it as a problem with the tool or the concept. What’s not working? Is it the character’s face, losing its shape while the object is still moving, or a problem with the physics? Go back to the fundamental mechanism that causes the error, strip the prompt right back and test again. Usually, on the second or third attempt, you’ll find the model can deliver exactly what you need when you have removed the conflicting signals that are overwhelming it.
Regeneration and iteration are not emergencies but part of the process of creating video with AI, and experienced creators are good at assembling cuts from the strongest takes, patching up minor errors, and moving on. While we’ve seen the AI generators evolve every quarter, today you can generate shorts that look intentionally and professionally made and entirely your own.
Short-Form AI Video Is Becoming Less About Editing and More About Directing
The way videos are created is changing fundamentally.
Traditionally, the video creation workflow is linear: shoot first, edit later. You shoot the footage, and then you spend hours editing, cutting, and adjusting everything. The AI-native workflow follows a different sequence: describe, generate, assess, redirect. The process starts with your idea (intent), not with the footage you shot with your camera.
The role of the creator is changing from editing to directing. The director chooses what is in the frame, how it is framed, how it moves, how it’s paced, etc. They make sure the shots go hand in hand. AI doesn’t take away the need for creative skills but reduces the cost and time of testing creative options. You can try dozens of versions of a scene, mood, or aesthetic in the time it used to take to make one render.
Creative judgment is more important than ever.
The fast generation makes it easy to try out ideas. It makes it harder for the creator’s judgment to weigh in. With so many options, how do you ensure you’re choosing the best ones for storytelling, engagement, and message alignment? The technology makes you faster, and the creative judgment determines whether what you make will resonate.
So, the key change is not from editing by hand each detail but redirecting and refining AI results. You’re not bound to one recording now. You guide the output, assess what works, and refine it with better prompts and clearer direction.
For marketers, it means experimenting with bolder ideas, finetuning hooks, and sharpening the visual language, without slowing down the production. It doesn’t mean that AI achieves virality autonomously. It means that you can experiment faster, and more freely, and unlock what resonates, while staying in control of your vision, from the first idea to the final cut.
When To Use, And Not Use, The Pixwith AI Short Video Generator
Pixwith is not a video editing tool for everyone. It’s a niche toolkit for generating original short-form videos from concepts, text and images.
A better sense of the role it can play in the bigger picture will make it more valuable to you, and less likely to cause frustration by being used for tasks that it’s not designed for, such as when you need a more conventional editor.
Pixwith.ai makes sense when:
[1] You Don’t Have Footage.
If you don’t have the option to shoot your own video, or a ready selection of stock clips, Pixwith can generate visuals from a prompt, script, product photo, or artwork and transform them into video content.
Whether you want to turn a written scene into a video, animate a product image into a commercial, or generate b-roll for a film, Pixwith can help you do so without needing to shoot anything, or source anything from stock.
[2] Experiment with Ideas.
You want to rapidly experiment with visual styles, moods, compositions and other creative directions. Pixwith is a fantastic tool for experimentation. It enables you to rapidly iterate and test styles, moods, compositions and other creative directions that might be tricky to test in a conventional editor.
Task it with generating a visual concept board, a pitch deck, a mood test, or a creative prototype and it will deliver a pre-production response that saves you time and gives you creative options.
[3] Build Variations
You need to generate multiple variations of a short-form ad or social video. A conventional editor is not the right tool for generating alternate versions of a short-form advertising or social video.
Whether it’s varying hooks, backgrounds or visual metaphors, Pixwith can generate multiple versions of the same concept quickly. This is ideal for testing ideas before publishing on TikTok, Instagram Reels, YouTube Shorts or paid social campaigns.
[4] Animate Static Assets
You want to animate static assets. If you have a product photo, illustration or brand visual that you’d like to bring to life, Pixwith can bring it to life through motion, camera movement and atmospherics. The result is animated, eye-catching content that doesn’t require the learning curve of motion-graphics software.
You’re working from an idea, not footage. At its core, Pixwith is a short-form video generator. It can help you bridge the gap between a script, brief or rough visual reference and a finished video.
A conventional editor may be better when:
[1] You Have Video Footage
You’re working with footage. If you’re working with recordings, interviews, event coverage, screen recordings, vlogs, raw camera files, then a conventional editor is the better tool. You’re likely to be cutting filler, syncing audio, excising errors and assembling a clean narrative. At the frame level, the detailed control required is not supported by generation tools.
[2] You Need Granular Control
You need precision and control. If you’re working with caption timing, transition placement, keyframing, speed ramps, color correction, multi-track mixing and client-mandated revisions, then a conventional editor is going to give you the exact control you’ll need over every frame and layer.
[3] Working on Complex Video Projects
You’re creating long-form or complex video content. Projects such as documentaries, tutorials, podcasts, webinars and other long-form video require existing media to be arranged with care. Pixwith is a short-form video generator; it isn’t designed for assembling an hour-long timeline or multi-source editing workflows.
[4] Adhere to Industry Guidelines
You have strict brand, or delivery, requirements. A conventional editor will give you the control and export settings that are required for projects with specific fonts, safe zones, codecs or frame-accurate edits. It’s not clear that Pixwith is well suited to this role, it’s more of a tool for generating creative content upstream than a final finishing suite.
The practical takeaway
Use Pixwith when you need to generate and experiment with creative visuals, test ideas, prototype short-form content, or animate static assets into a short-form video. Use a conventional editor when you need fine-grained control for editing existing footage, audio fine-tuning, captioning and timeline control at the frame level.
For many video projects, you’ll find value in using both tools together. Generate creative clips in Pixwith and import them into a conventional editor to finish with polish, pacing and delivery. A balanced approach can deliver speed and originality with control.
A Practical 15-Minute AI Short Video Challenge
Instead of spending hours perfecting a single prompt, use this challenge to make a focused experiment and learn quickly. We’ll be using Pixwith’s AI Short Video Generator to test out a single idea and compare results with only a few slight adjustments.
Within 15 minutes, you’ll have two short videos and a real sense of how camera movement and lighting truly affect the final output. Let’s get started. Set a timer and fire up Pixwith.
Step 1: Nail the One Idea
Start with one simple, visual idea. For example; A tired office worker sees running shoes under their desk and flees.
The more consistent your people, setting and basic idea, the easier it will be to spot the effect of a change. Try not to switch concepts mid-challenge! One idea, one person, one scene.
Step 2: Write Your Base Prompt
Write out a single, clear sentence to describe your scene.
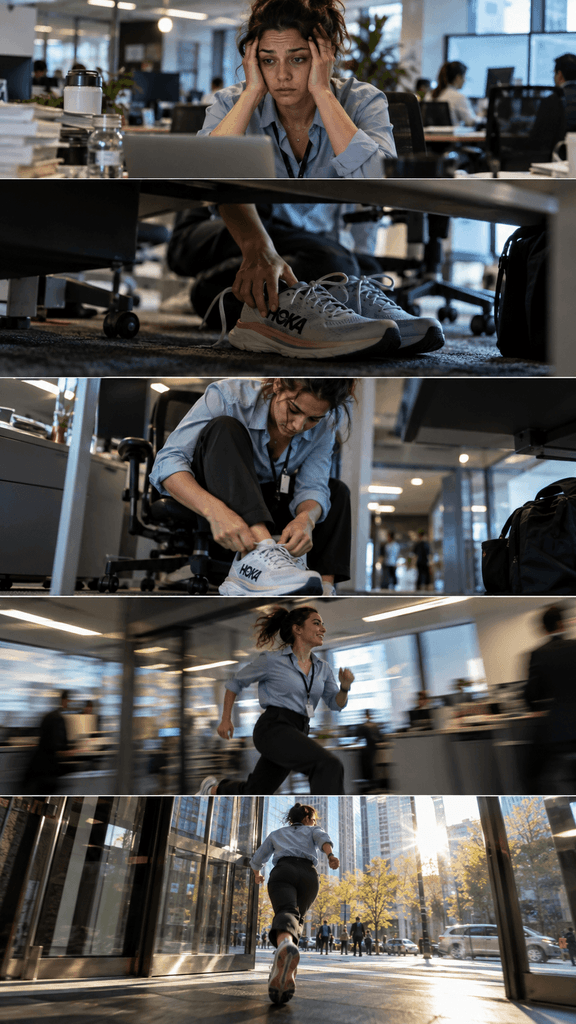
Try this prompt – “A tired office worker notices a pair of running shoes tucked beneath their desk. They wear them and sprint for the exit. Natural lighting inside the office. Realistic motion. Cinematic handheld camera. Short-form video.”
Don’t overthink this. Use concrete visual details as most video generation models doesn’t like abstract language. This is your base prompt. Use it to refine it.
Step 3: Make the First Short Video
Feed your prompt to Pixwith’s AI Short Video Generator, choose your AI model, and create your first video. This is a rough sketch, not your best work.
Watch it twice, no judgment. What are you seeing? What does the character look like? What’s the quality of the run? What’s the camera doing? What style of lighting are they using?
Write it down, or just make notes in your head.
Step 4: Which Part of Version 1 Could You Improve?
This is where the real learning starts. What’s one thing you would improve about Version 1? Maybe the movement is stiff, the camera is boring, the lighting is unrealistic or the video just doesn’t pop. Whatever it is, pick one thing that could go better. Don’t try to fix multiple issues at once. This is the power of this challenge. Make one change at a time; once you are satisfied with your output, tackle the next problem.
Step 5: Make Only That One Change
Go back to your prompt and make only the one change you picked. If the camera is boring, maybe you need to rewrite that part to “the camera follows the tired office worker as they slip on the running shoes and sprint for the exit.” If the lighting is wrong, adjust only that. If it’s too robotic, try adding “a dynamic, natural sprint with a slight wobble.” Make only this change to your prompt. This allows a clean A/B test between Version 1 and Version 2.
Step 6: Make Version 2 and Compare Versions
Now you have Version 1 and Version 2 side by side. Watch both in a row. Did that single change make a difference? Maybe there was a big improvement, a subtle one, or it surprised you. This is a concrete lesson in how the AI system actually works when you tweak your prompts. This micro-experiment will teach you more in 15 minutes than you could learn in hours of random experimentation.
Why This Challenge Works and What You’ll Learn
This challenge isn’t just a way to get a viral video done in 15 minutes. It’s an opportunity to develop a trained eye and sharper instincts for writing prompts. You’re isolating one variable and building a cause-and-effect library. Future projects will go faster and more predictably. Pixwith’s rapid rendering allows you to iterate quickly without waiting for long renders. You’re learning in the moment.
The Next Step
Instead of spending an hour trying to figure out your first AI short, open up Pixwith and see how many versions of one idea you can experiment with in 15 minutes. Grab an idea, fire up Pixwith’s AI Short Video Generator and try this challenge now.
Your skills will only improve, and you’ll have two videos and confidence in steering AI creativity with pinpoint precision.
Final Takeaway: Generate Less Content, Learn More From Every Generation
The real value of AI isn’t just more content. It’s generating the right content faster, using iteration to distill lessons, sharpen ideas, and create superior output.
Rather than trying to generate as much content as possible, the value in creative tools comes from learning what each generation tells you. What worked, what felt off, or what needed more clarity in its visual or narrative language.
The real goal is getting from an abstract idea to a clear visualization of that idea faster, and with less friction. With every iteration you learn something specific about your pacing, tone, composition or structure. Using that knowledge makes better creative decisions, and a clearer vision for your video’s end.
————
Try Pixwith with a single idea and generate, compare, refine… turn it into a finished short video. Focus on what each version can teach you not how many you create. Stronger content will happen faster.
Suggested FAQs
What is a free AI short video generator?
A free AI short video generator uses artificial intelligence to create video clips. You can create video from text prompts, images, or a combination of both. Using an AI video generator avoids long hours spent filming or animating, instead, you can describe what should be shown, how it should be animated, and the look and feel, and the AI can generate it for you in seconds.
Free generators are great for the idea generation phase of a project, where you want to test the look, feel, and hook of the video to see how it will appear in short-form video platforms like TikTok or YouTube Shorts. Think of this as a sketching tool for video. A free AI short video generator is ideal for exploration and creating different prototypes to see what captures attention or creates engagement. Don’t use it for trying to create a polished, viral-ready video clip. Speed and being able to try lots of ideas quickly is the value for learning before investing a lot of time.
Can AI create videos for YouTube Shorts and TikTok?
AI works great for YouTube Shorts, TikTok, Instagram Reels and any other short-form video platform. AI gives the raw visuals, it’s up to you to customize them. Pay attention to the aspect ratio (usually 9:16 for vertical video platforms), the pacing of the video, the length of the video, captions, and format requirements for each platform.
Pixwith is a great tool for this. You can quickly explore ideas and generate a few different video ideas for short-form video platforms quickly. Try different visual hooks, tweak the settings or styles, and see what works and engages viewers without even needing a camera. It’s more about running quick experiments to see what is interesting enough to invest time in and refine.
Can I create short videos from text prompts?
Yes, this is a key feature of most AI video generators. Describe what you want shown in the video, what’s doing, what kind of camera movement is wanted, the setting, lighting, and the overall look and feel of the video, and the AI will interpret your description and generate a short video around this.
Don’t overload your initial prompt with too many details. Instead, start with a simple and clear prompt that defines a single core idea. For example, a prompt like, “The silhouette of the dancer, with neon lights in the sunset, slow motion, handheld camera” is more likely to be effective than a prompt containing ten separate instructions crammed into one sentence. Generate, tweak one thing, generate and see what works. The idea is to learn how to control the AI to explore promising visual directions, not to aim for perfection.
Can I animate an image into a short AI video?
Yes, this is great for animating images you already have. Image to video processes allow you to transform still images into moving scenes. You can take a picture of a product, digital art, character design, a photo, or even a hand-drawn sketch, and you can describe the movement you want and the camera actions you want the video clip to perform, like a zoom in or a pan across the scene or blowing the hair in the wind.
The key is to maintain the subject matter of the image and clearly define what is moving or what movement the camera should go through so the AI can interpolate the frames that need to be generated in between. It’s great for quick social media teasers, animated posters, or adding movement to static images. You start with an image from your own collection, and you’re seeing what happens if you test a static idea with movement, which can also give you ideas for new content.
How should I write prompts for short AI videos?
Start with the subject and the action, add the environment, camera movement, lighting, and add any details or descriptions you want. Your first prompt might be “A chef tossing vegetables in a wok, steam rising, warm kitchen lighting, shot from above.”
Start with a simple prompt, single idea, as it’s more likely to get better results than complex prompts, which can confuse the model and lead to dull output. You can always improve by changing one of the factors (like camera speed or lighting) until it improves. By changing one factor at a time, you can identify what improved the outcome. Try testing and learning instead of aiming for a perfect first prompt. This also aligns with the intended purpose of the AI video generator.
How long should an AI-generated short video be?
Focus on a single visual moment or action. AI video clips work best when they are short. They can focus on a single idea, so the key is to deliver a single interesting moment rather than fill time.
Build multiple short video clips that are consistent and edit them later. Focus on the flow, the pacing, and the value of the content, not the duration. A 5-second clip that is impactful and powerful is better than a 20-second clip where the action fades or is confused. It’s best to use AI to generate the individual video clips and then edit them together for a final polished result that feels intentional.
Do I still need a video editor after generating AI clips?
Yes, most of the time you will need to. The video generation process and the video editing process have different roles and are complementary to each other. You can use a tool like Pixwith to generate footage quickly, test visual ideas, and create variations quickly that would take hours to film or animate, and this is where speed is optimized and creative exploration is maximized.
Then, after you have generated a few AI video clips, bring them to your traditional video editing software to manage everything with minute-level control. Here’s where you can cut with frame-level precision, add subtitles, make refined transitions, mix audio, and manage your timing with millisecond-level precision. This is where the AI gives you the experimental footage and the editor gives you the polish. This is where the search for perfection with AI ends and the process of quickly testing and refining the most promising ideas starts.